

Why route Supabase auth through Prelude
Supabase sends phone-authentication codes through one default SMS provider. Prelude picks a route per message: it sends across 30+ providers and moves to the next best route when one fails. Route choice follows what performs in the destination country, and codes can arrive over SMS, WhatsApp, Viber, or RCS. Setup is a webhook URL and a secret. Nothing else in your Supabase project changes.Prerequisites
- A Supabase project.
- A Prelude account.
Step 1: Get the webhook URL
From the Prelude dashboard, go to “Verify API > Configure > Integrations > Supabase” to get the webhook URL and copy it.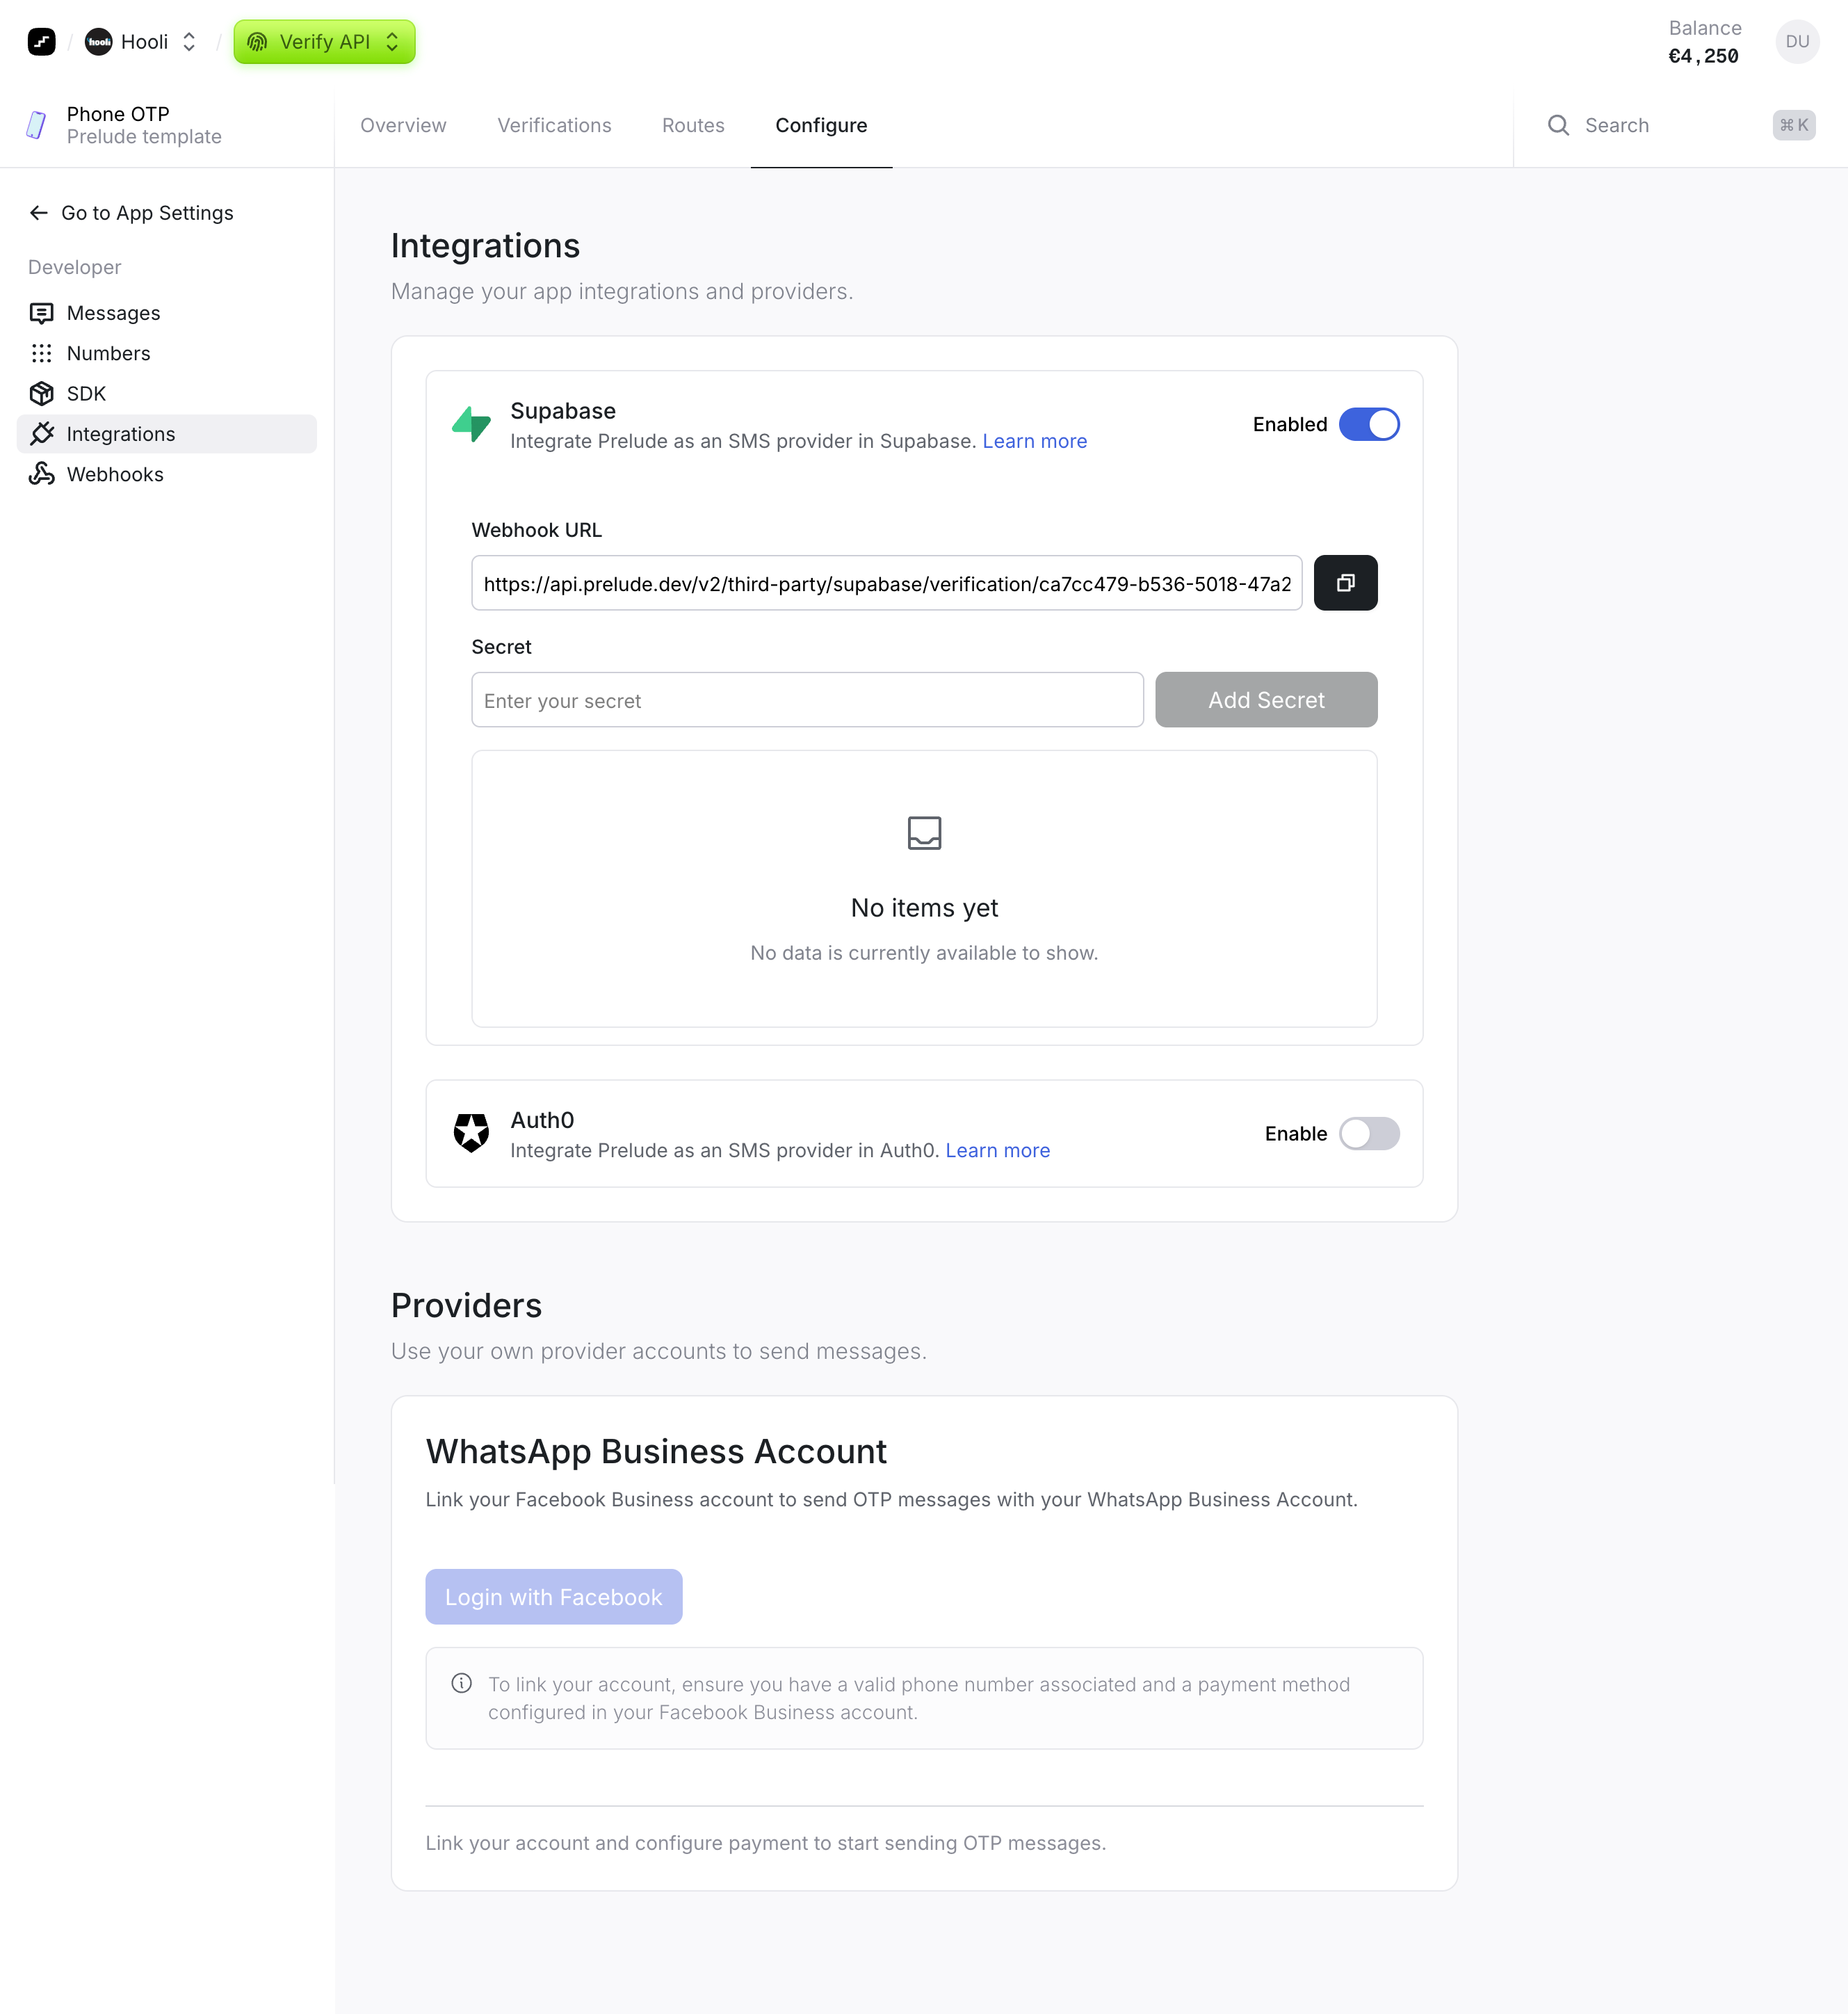
Step 2: Add the webhook URL to Supabase
In your Supabase project dashboard, navigate to the “Authentication” section. Click on “Hooks” in the sidebar, then click the “Add a new hook” button. Select “Send SMS hook” from the options.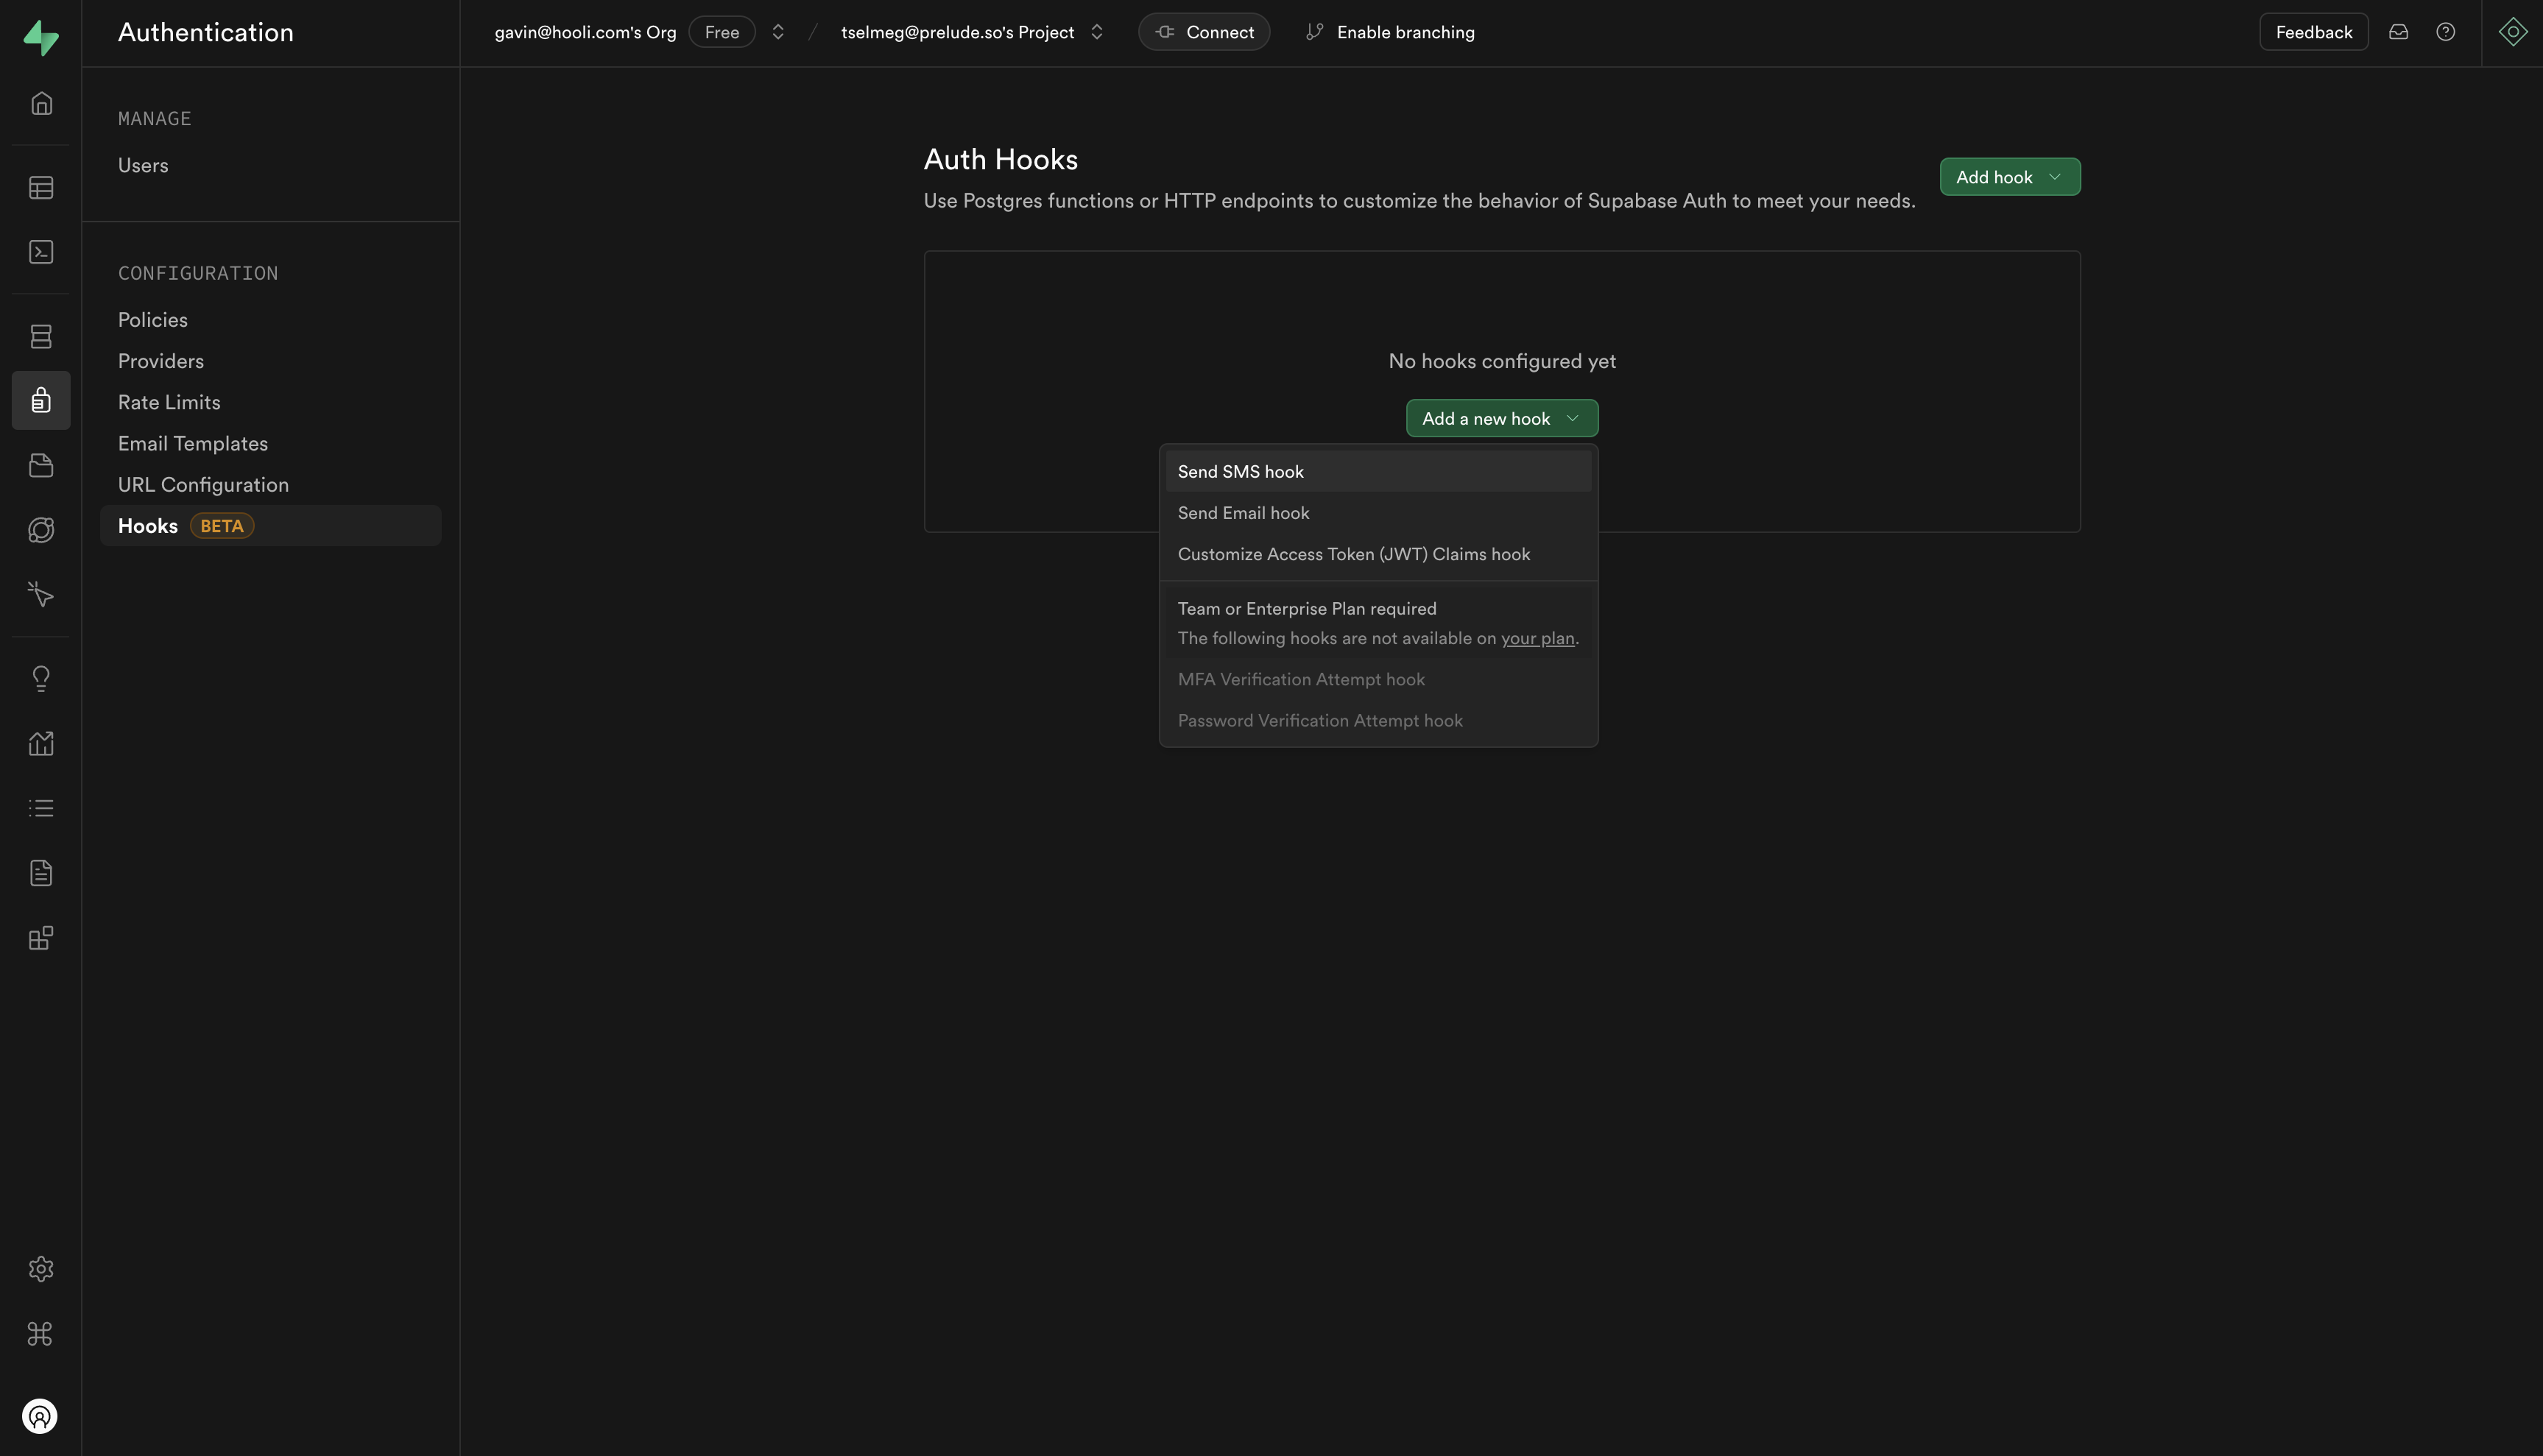
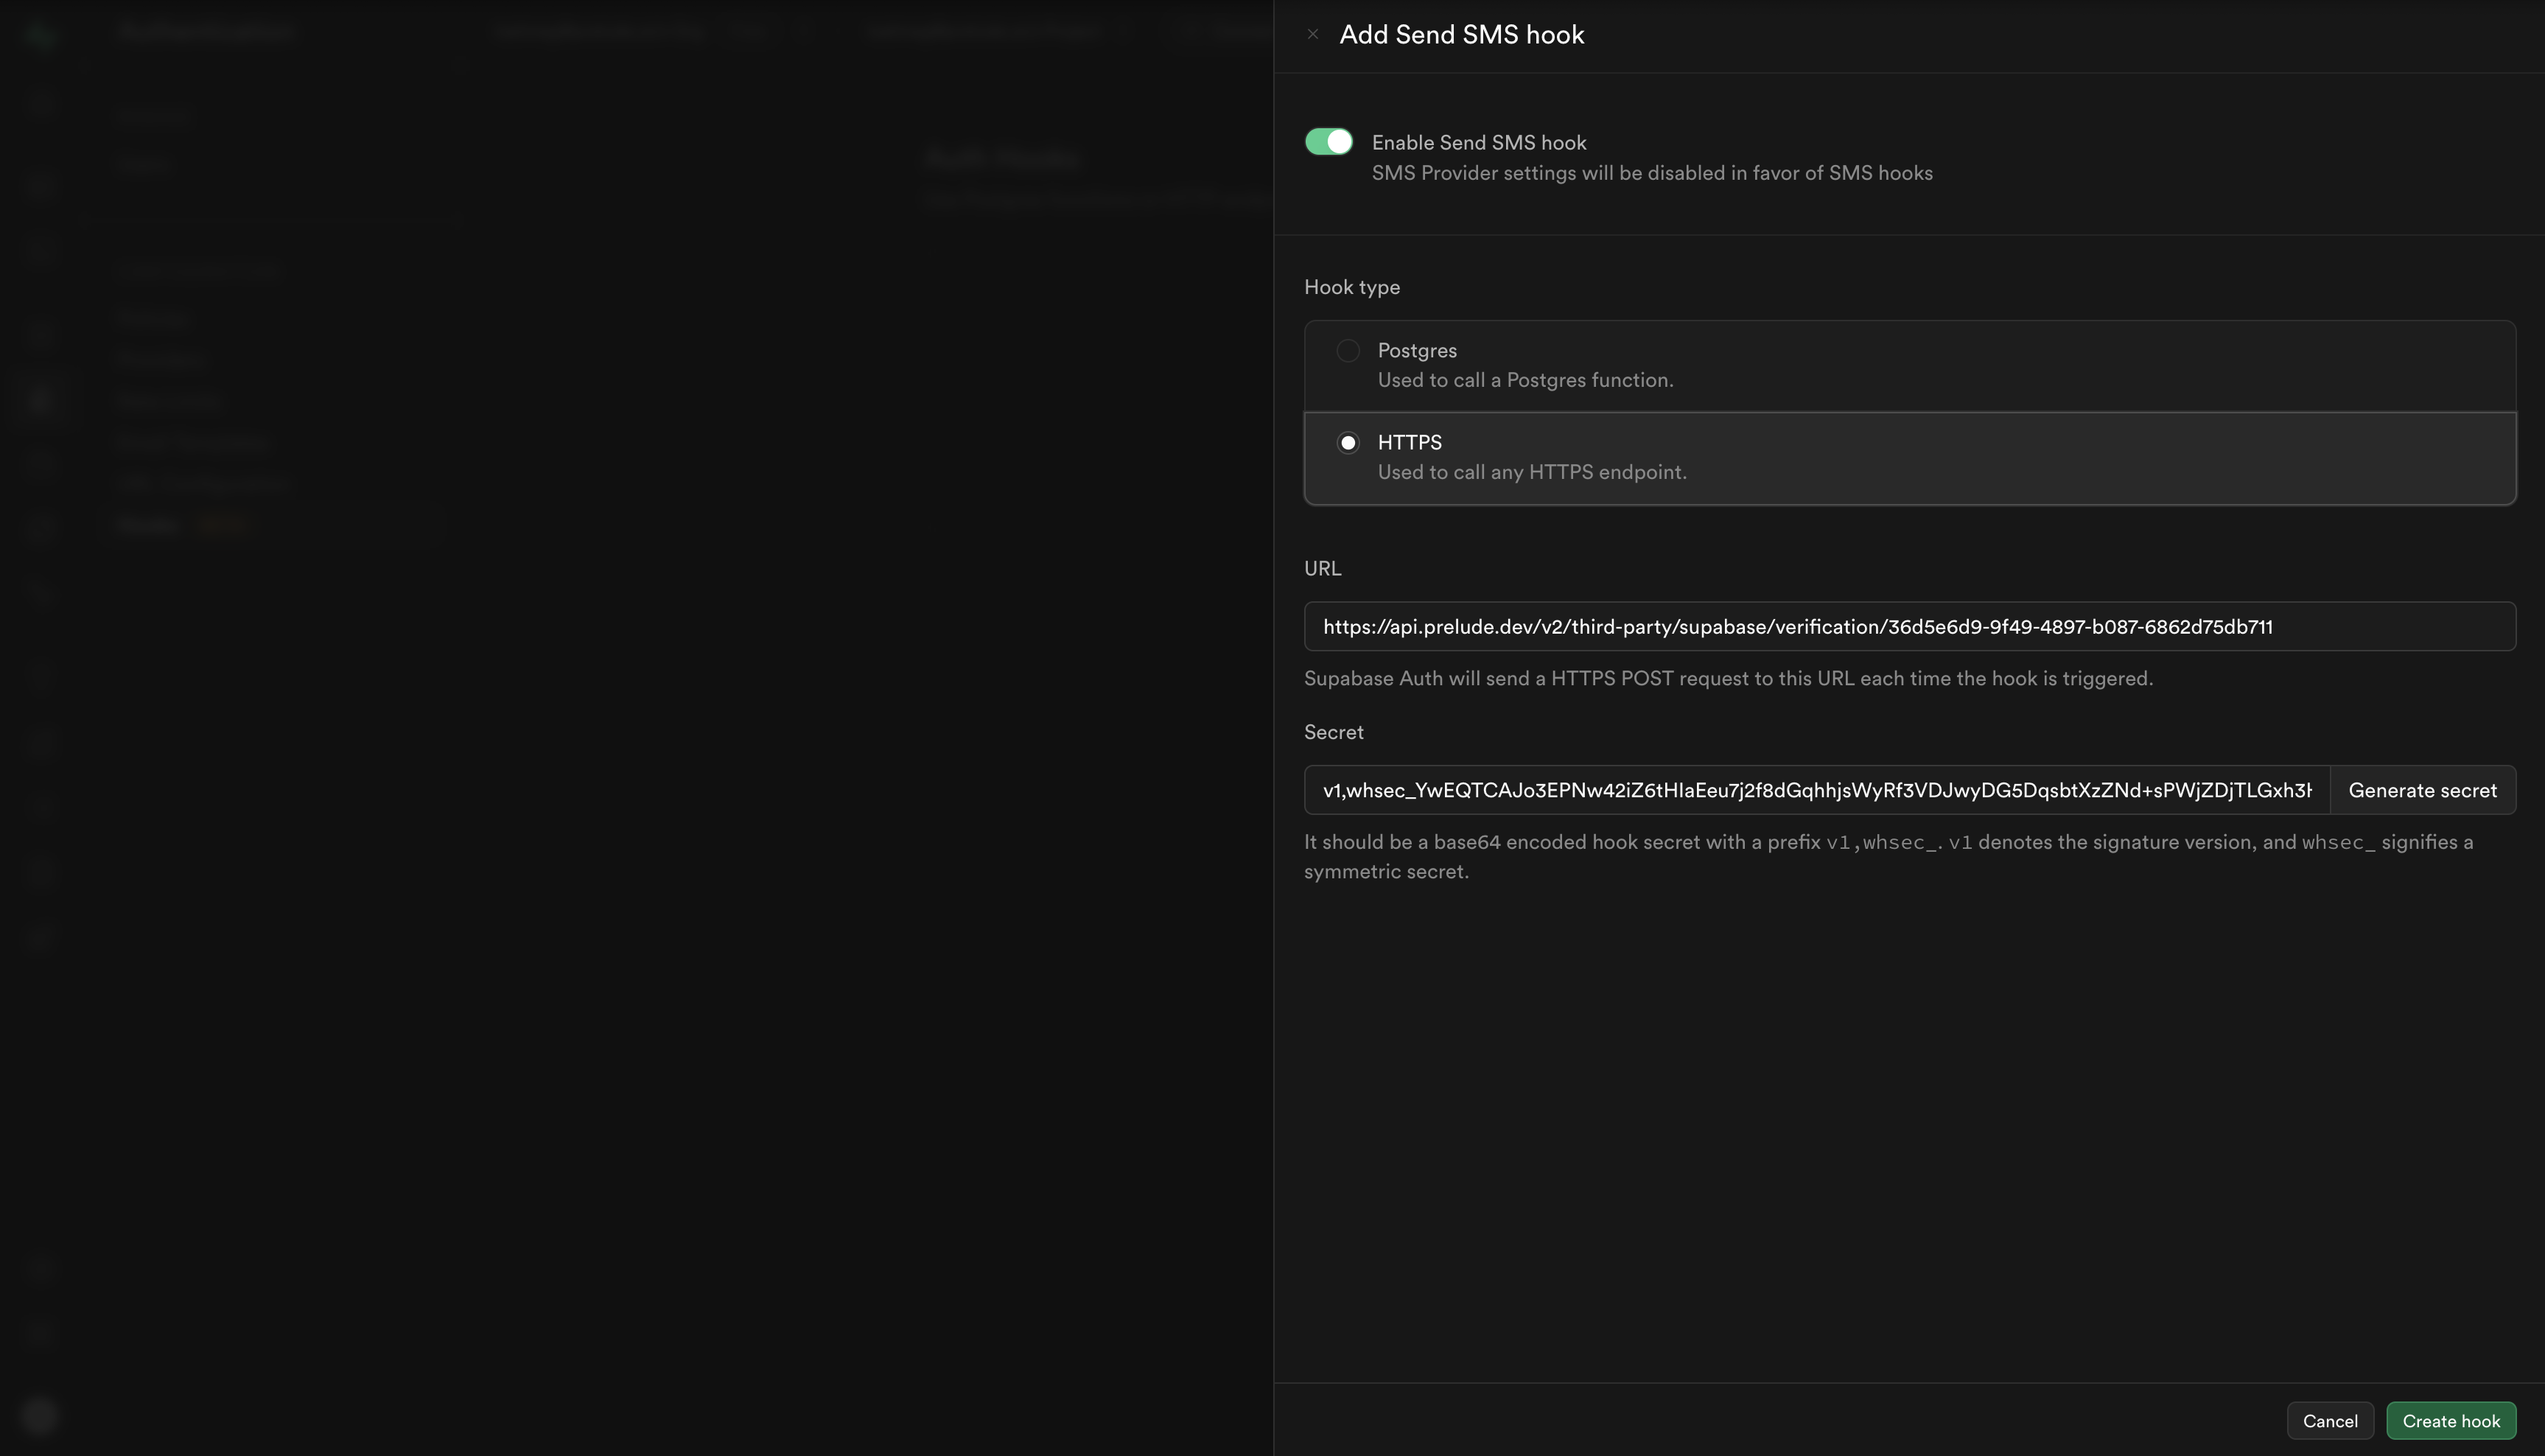
Step 3: Add the Supabase secret to Prelude
Head back to the Prelude dashboard and navigate to “Verify API > Configure > Integrations > Supabase”. You’ll see a field labeled “Secret” - paste the secret key you just generated in Supabase into this field and click “Add Secret”. This connects your Supabase project to Prelude securely. Once added successfully, you’ll see the secret appear in the list below. You can add up to 3 secrets if needed, and revoke them at any time.Step 4: Enable phone authentication in Supabase
In your Supabase project dashboard, navigate to the “Authentication” section. Click on “Providers” in the sidebar, then click the “Phone” provider. Turn on the “Enable Phone Provider” toggle and click “Save”.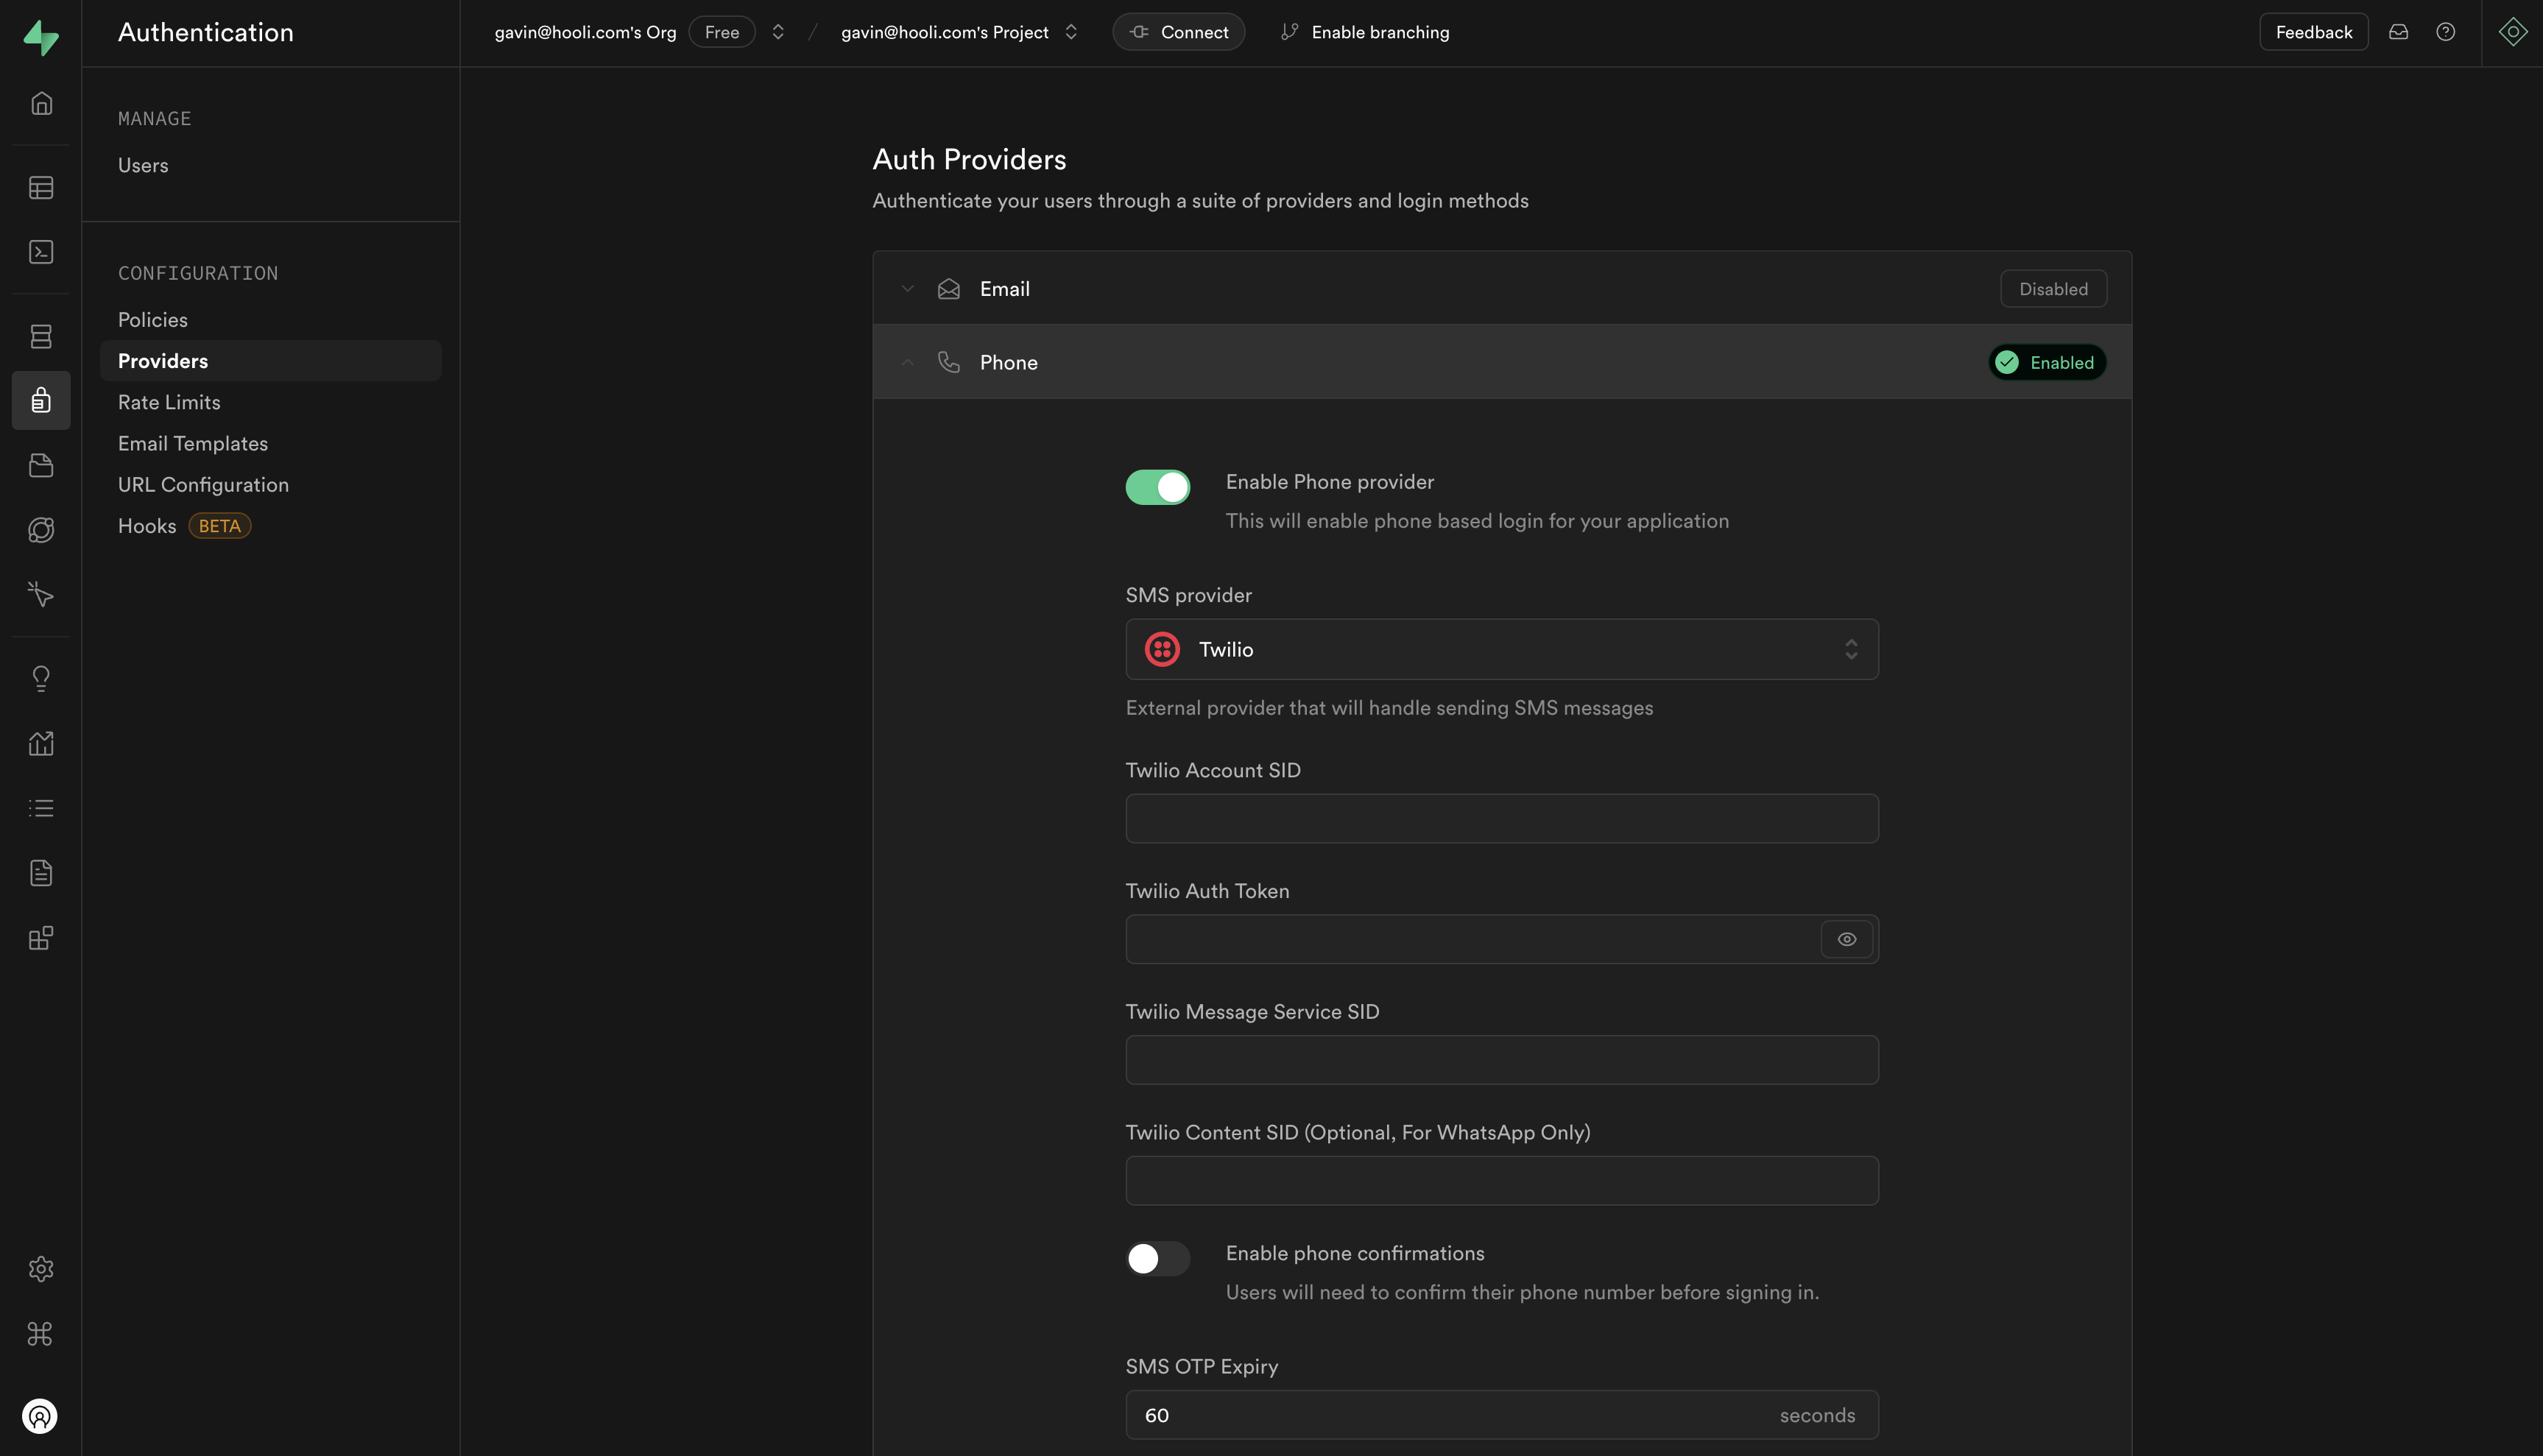
Test the integration
Supabase now routes phone authentication through Prelude. Sign in with a phone number from your application using Supabase’s client libraries: Supabase hands the verification to Prelude, and the code reaches the user over Prelude’s routes.Sandboxed phone numbers do not work with this integration. Supabase generates its own verification code and checks it internally.
Troubleshooting
If you encounter any issues, here are some common error codes you may receive:invalid_phone_number: The phone number provided is not in a valid E.164 formatinvalid_api_key: The webhook secret is incorrect or missingcustomer_not_found: The customer ID in the webhook URL is invalidinsufficient_balance: Your Prelude account needs to be topped upblocked: The authentication attempt was blocked.supabase_not_enabled: The Supabase integration is not enabled for this account.